| 1-point_perspective_word_art_grade_7_rubric.docx |
|
0 Comments
We started learning about 1-point perspective drawing in February. We began by discovering how to draw accurate 3D cubes. Please check out this video for a refresher on the steps. Don't worry about drawing the cubes that overlap each other! We will learn that in more detail when we return to class in person!
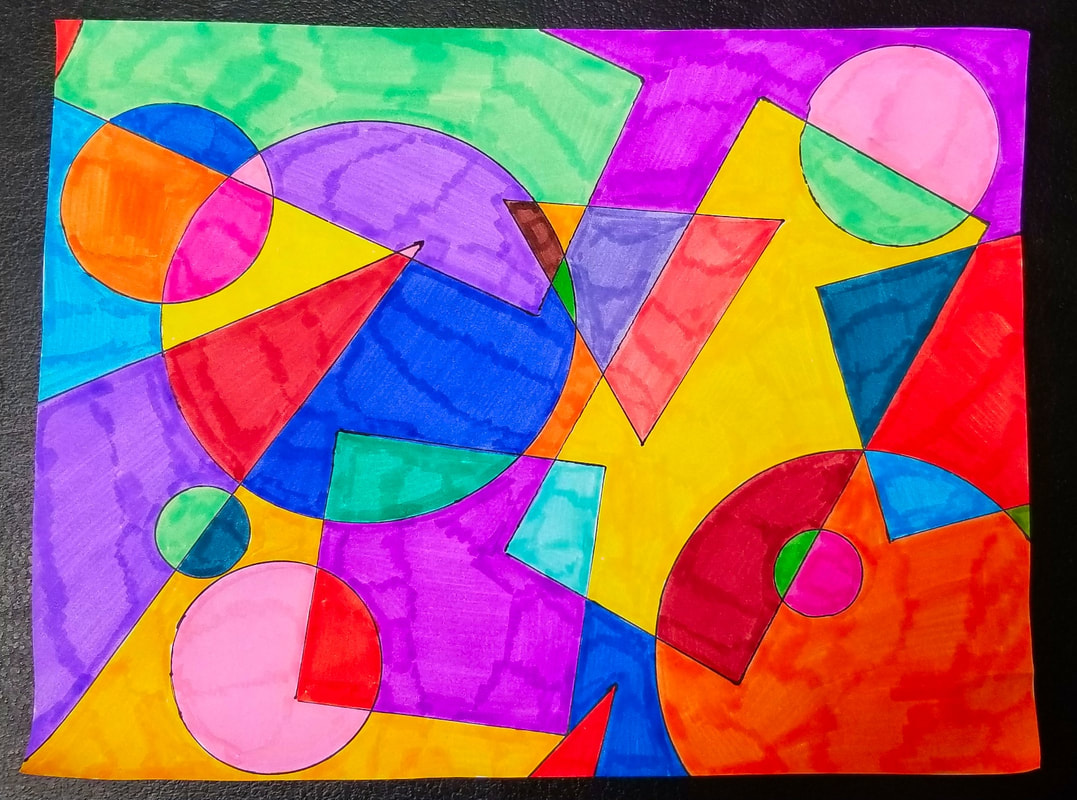
Important terms to use include horizon line, vanishing point, vertical lines, horizontal lines, and converging lines. We will review these terms together several times throughout this unit. Let's use shape to create a cool piece of art! Search around you and find a variety of different shapes. Make sure you are able to trace them out easily and that they aren't any bigger than your hand. You will need a fresh piece of paper in your sketchbook or a piece of white paper. You will also need a pencil, a black sharpie (or marker), and either your pencil crayons or markers. Play the video below for step-by-step instructions on what to do. I've also included a picture of a finished project for you to get an idea of what we are working towards. Take your time with this. Plan out your colours and how you are going to organize your shapes. This should take you at least 2 classes of time to do. Have fun!
Shape is a two-dimensional area that is confined by an actual line or implied line
(for example: the edge of a canvas or paper). Shapes are created when the ends of lines are joined to enclose areas. 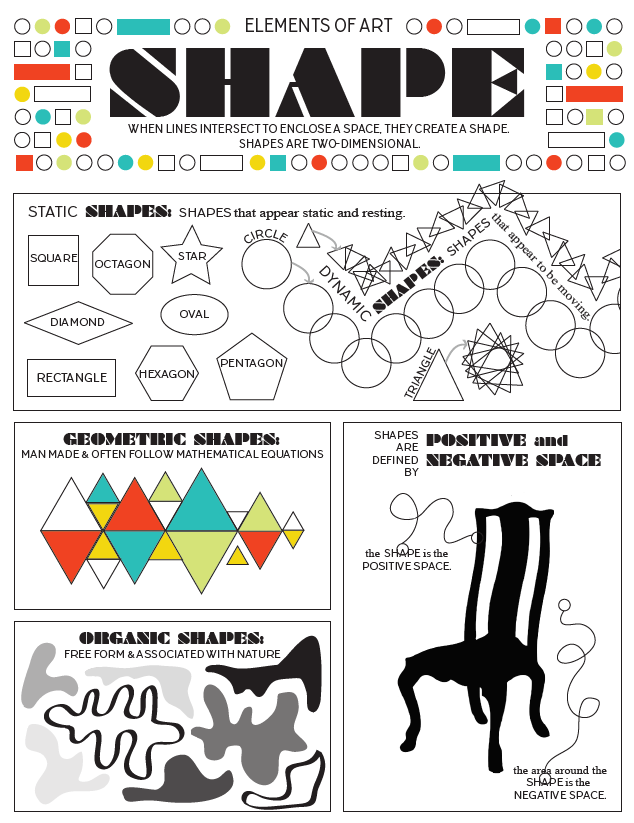
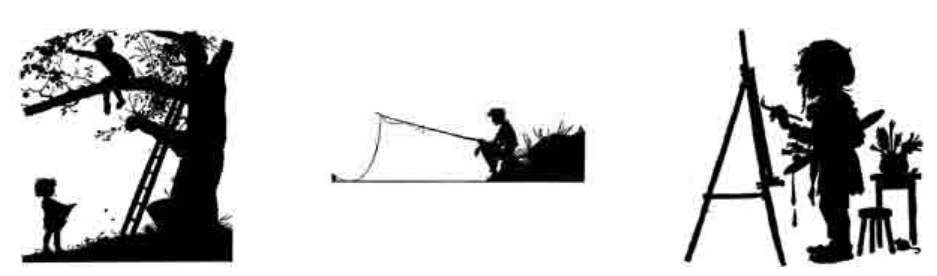
Can you identify the positive and negative spaces in these 3 images?
Class discussion:
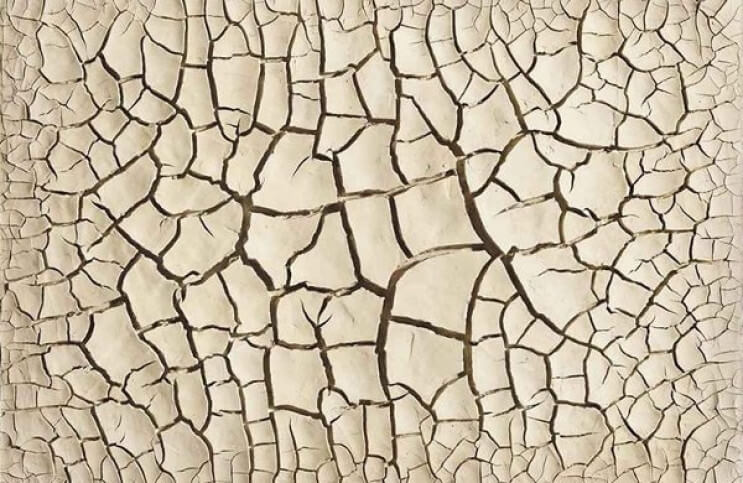
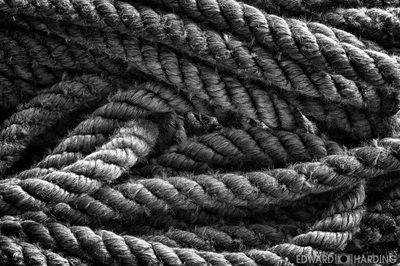
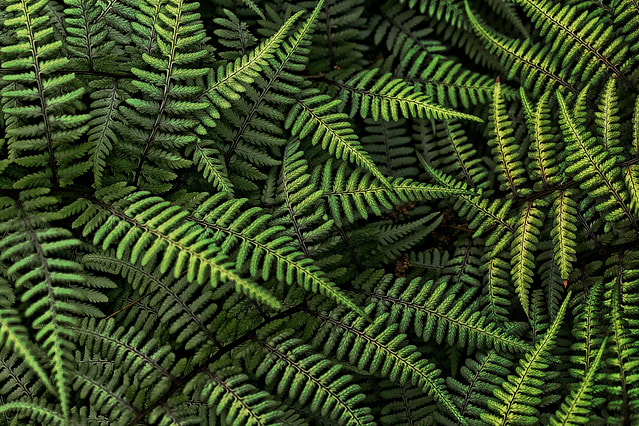
Take a look at all these different textures. We can imagine just by looking at the pictures that some of them feel soft, smooth, bumpy, prickly, and even slimy! 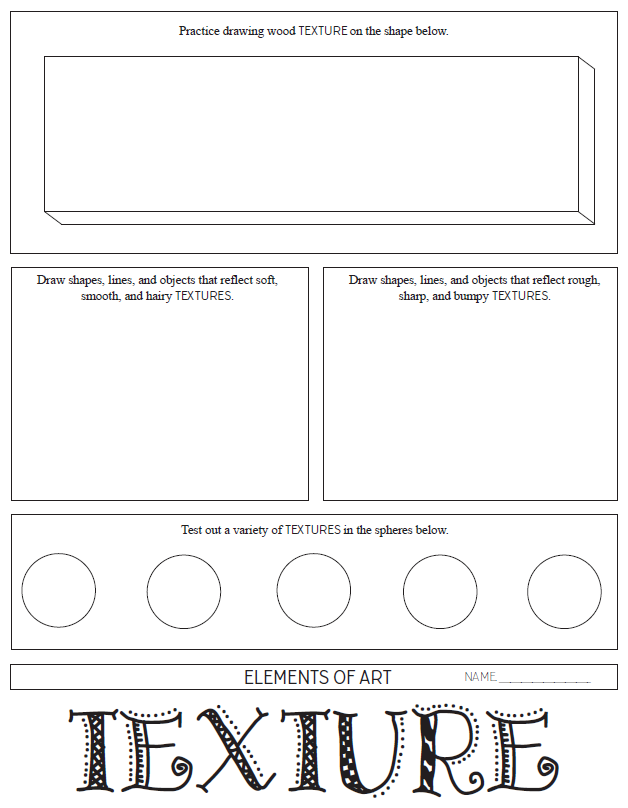
Texture in artwork can be found in 2 different ways: real and implied
Real (or actual) texture is when someone can actually feel the texture through touch. We are able to use our sense of touch to experience it. Implied texture is visual but can't be felt through touch. Look at the images below. Do you get the sense of the texture of these images even though you can't actually touch the cracked earth, the rope, or the ferns? Even though these are images, the implied texture brings up a strong sense that we can actually feel or experience what these things would feel like if we could touch them! This is one way that artists make their artwork interesting and appealing to viewers.
Watch this short video for more detail on why texture is an important element of art used by artists!
Your task for today's art class: find 3 different textures around your house and do texture rubbings of 3 of them.
Look around your house. There are a bunch of different textures all around you! Look at the floor. What texture do you see there? A hard wood floor, tile floor, and carpet each have very different textures. What about your walls? Your table? The fridge door? Your bed spread? All these surfaces likely each have different textures. Take a piece of paper and do 3 texture rubbings of different surfaces. Label each one so you remember where you found this texture. To do a texture (or surface) rubbing you'll need white paper and a soft pencil (crayons also work well!). Put the paper over the surface you're going to use and hold the paper firmly in place with your hand. Take your pencil (or crayon) and press it back and forth over the paper. If you're using a pencil, hold it on an angle so the pencil tip doesn't rip through the paper. The raised patterns on the surface you're using will start to copy onto your paper. Label what surface you have used and attach these 3 textures into your sketchbook. During our 2nd Teams meeting, we will talk about some of the different textures you've found. How to do a texture rubbing video is below in case you need more info!
The grade 7's have started their new unit this week! This unit will explore colours using paint as well as different lines. Students will be combining their knowledge into one large painting at the end of the unit.
The classes have learned the basics of colours: primary, secondary, and tertiary colours. They have also learned about warm and cool colour groups. Each student was given the 3 primary colours of paint and experimented ways in which they could create secondary and tertiary colours. They painted in colour wheel and a tertiary colours worksheets. Remote learners: please review the introduction PDF below and watch the video in the file. The 2 worksheets are located below for you to download. For this unit, you will need your paintbrushes, a pencil, and the 3 primary colours of paint: yellow, red, and blue.
|
|||||||||||||||||||||||||||||||||