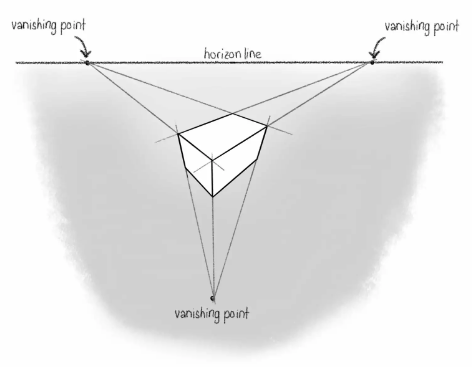
New unit: 3-point perspective
|
Let's review 1 & 2-point perspective before we move on to more complex perspective drawings!
Click on the article title below to learn why perspective is so important in art. |
|
Watch the videos below for detailed instructions. Do a drawing that follows along with each video. Add full value.
Submit your two drawings to the office by April 19th. There should be at least 6 cubes in each drawing.
Submit your two drawings to the office by April 19th. There should be at least 6 cubes in each drawing.
|
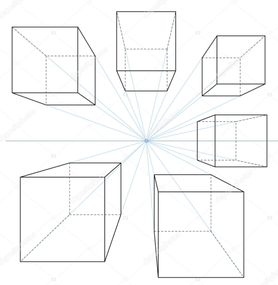
1-Point Perspective Cubes
|
|
|
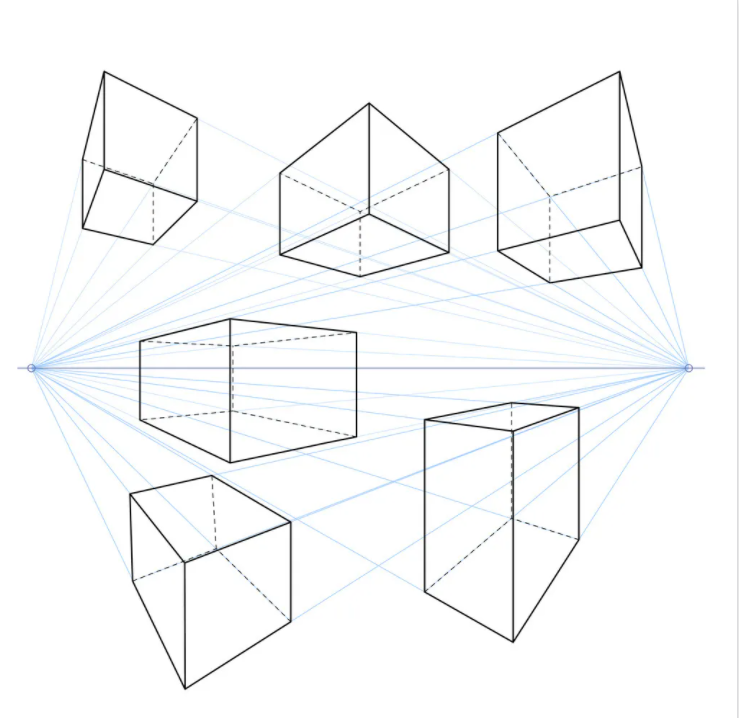
2-Point Perspective Cubes
|
|
The file below gives step-by-step instructions on how to draw cubes in 3-point. Follow along and create your own drawing of 3-point perspective cubes. Decide where your light source is going to be and then add full value. Submit your drawing by TBD
| 3_point_perspective_cubes.pdf |
Now, let's draw a city block in 3-point perspective. Click on the file below for step-by-step instructions. Create your own 3-point perspective city block and submit your artwork by TBD
| 3_point_perspective_city_block.pptx |
3: SURREALiSM
The grade 9 students have started their unit on Surrealism. We have learned some of the basic concepts of the Surrealist art movement. In class, groups have collaborated to do Exquisite Corpse sketches. Next week, groups will be creating large-scale painting renditions of one of their Exquisite Corpse sketches. Some big names in this form of art include Salvador Dali, Rene Magritte, Freida Kahlo, and Andre Breton. As the unit progresses, students will learn about many important works of art, more contributing artists, various mini-projects, and one final project that will incorporate everything that has been learned.
Remote learners: please look over the information in the downloadable files below and watch the videos included in the PDF as well as the other video to enhance your understanding. You will do a research project on a Surrealist artist of your choice. Download the file below for project requirements. The research project is due by February 29, 2024.
Remote learners: please look over the information in the downloadable files below and watch the videos included in the PDF as well as the other video to enhance your understanding. You will do a research project on a Surrealist artist of your choice. Download the file below for project requirements. The research project is due by February 29, 2024.
Remote learners: In the PowerPoint below, you will learn about the major elements of Surrealism most of found in this art form. Please look over the slides and try to identify the different elements in the images.
| elements_of_surrealism.pdf |
Here is the next project for our unit on Surrealism. You will be creating a collage that incorporates the elements of Surrealism you learned in the PowerPoint. The collage is due by Friday, March 22, 2024.
| collage___elements_of_surrealism_collage_project.pdf |
Once you finish your collage, take some time to reflect and consider these questions:
Respond to these four questions above in one of the following ways:
- What are the 3 elements of Surrealism I included in my collage? Describe where these elements each are.
- What was my favourite part about creating a Surrealist collage, and why?
- What did I find most challenging, and why?
- What did I find most interesting about Surrealist art in general, and why?
Respond to these four questions above in one of the following ways:
- writing a paragraph on each question and submitting through email
- recording a video or an audio video where you respond to these questions, and submit the file to your teacher
- organizing a TEAMS meeting for a brief discussion with your teacher
|
| ||||

The Triumph of Surrealism by Max Ernst (1937)
Max Ernst is a surrealist artist whose artwork was greatly influenced by his experiences in WWI. Take a look at this famous painting of his in the file below and read a little bit more about him!
Max Ernst is a surrealist artist whose artwork was greatly influenced by his experiences in WWI. Take a look at this famous painting of his in the file below and read a little bit more about him!
| surrealism_max_ernst.pptx |
Write down and submit your thoughts on the painting highlighted in the PowerPoint.
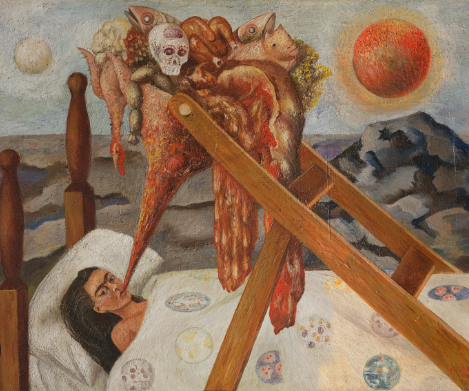
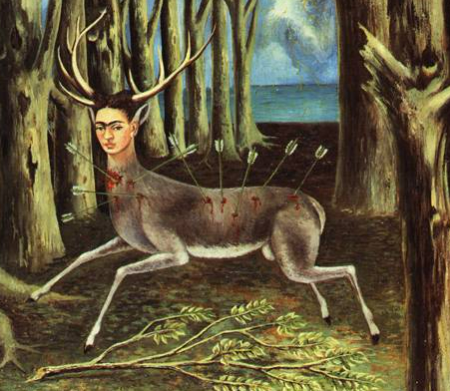
Frida Kahlo is an important and unique surrealist artist. She lived a life full of political and social activism, fought for gender equality, was proud of her Mexican culture and identity, and became an excellent example of resilience. Throughout her life, she faced challenge after challenge (illness, injury, heartbreak, and even amputation). But, rather than let these challenges stop her from creating art, she used these traumatic events in her life as motivation and inspiration. Her paintings tell the stories of her struggles and her healing.
Take a look at the short biography videos below to learn more about Frida Kahlo!
Take a look at the short biography videos below to learn more about Frida Kahlo!
|
|
|
|
|
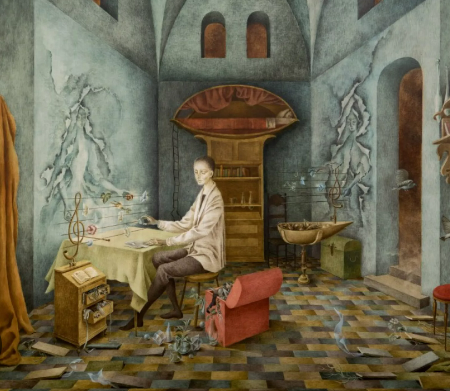
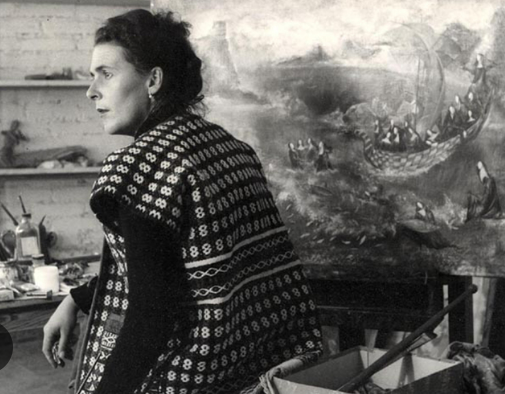
Remedios Varo
|
| ||
Write down and submit your thoughts on the painting highlighted in the PowerPoint.
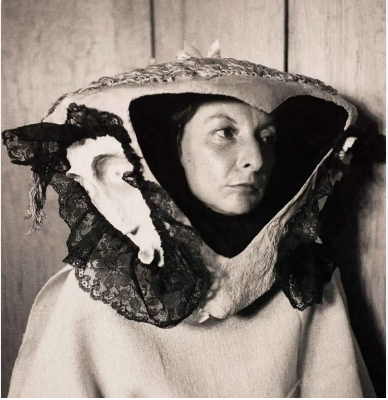
Lenora Carrington
|
| ||||
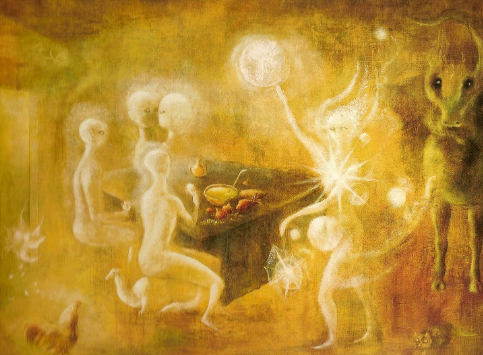

Write down and submit your thoughts on the painting highlighted in the PowerPoint.
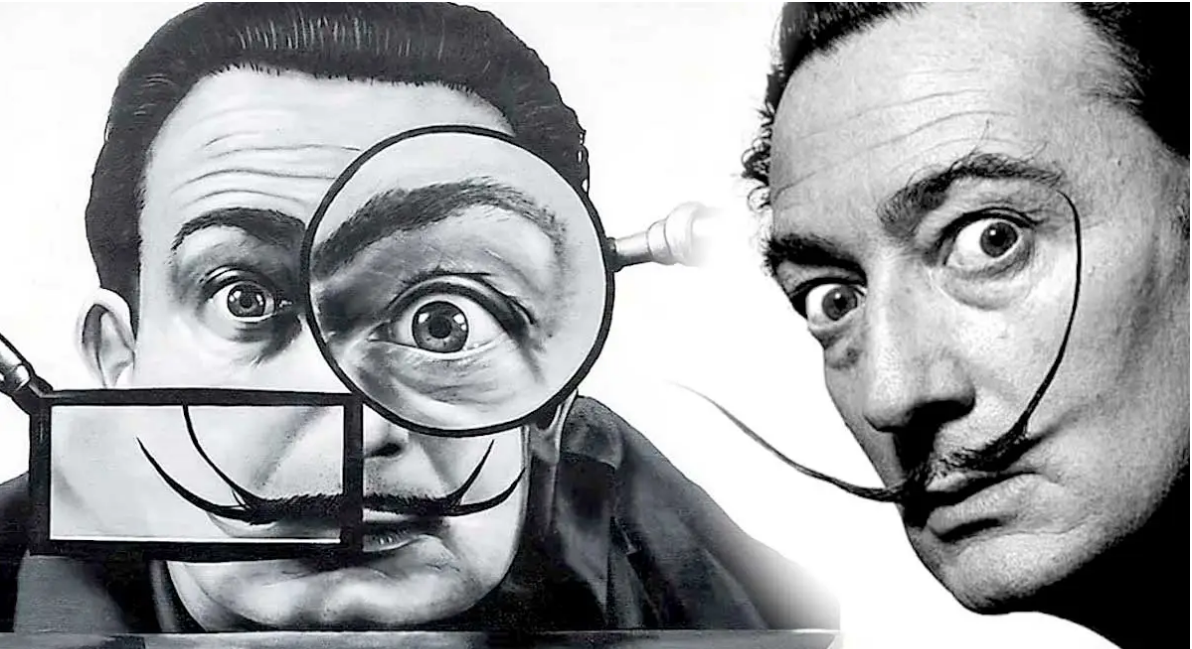
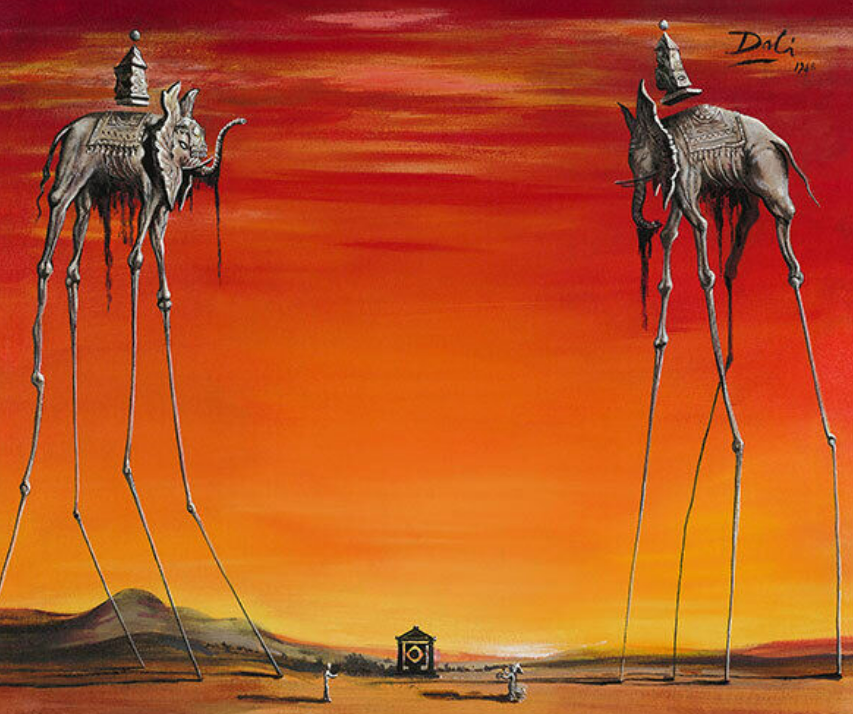
Salvador Dali
|
| ||
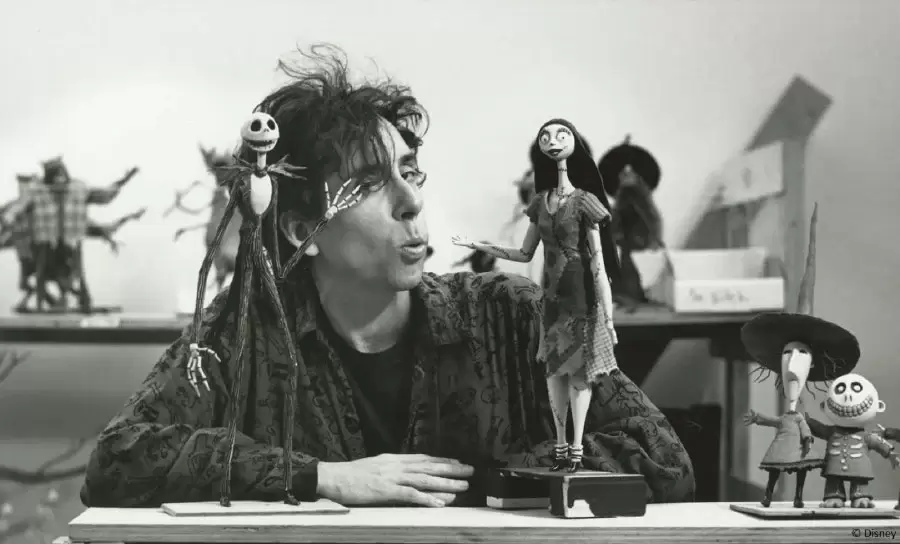
2: Tim Burton Inspired Self-Portraits
This project has many steps. Start with the portrait instructions document to understand the steps you'll take.
|

| ||||
|
| ||||||||||||||
1: Create your own Artist Trading Card!
Your first assigment this year is to create your own personal artist trading card on an index-sized piece of paper.
This trading cards should include the awesome things about you that you're most proud of. For example, you could include:
Get creative with this! Design an interesting layout and make it eye-catching.
This trading cards should include the awesome things about you that you're most proud of. For example, you could include:
- Your name
- A drawing or photo of you
- Your hobbies
- Your favourites (colour, animal, sport, school subject, etc.)
Get creative with this! Design an interesting layout and make it eye-catching.
PORTRAITS
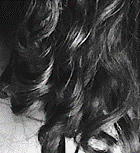
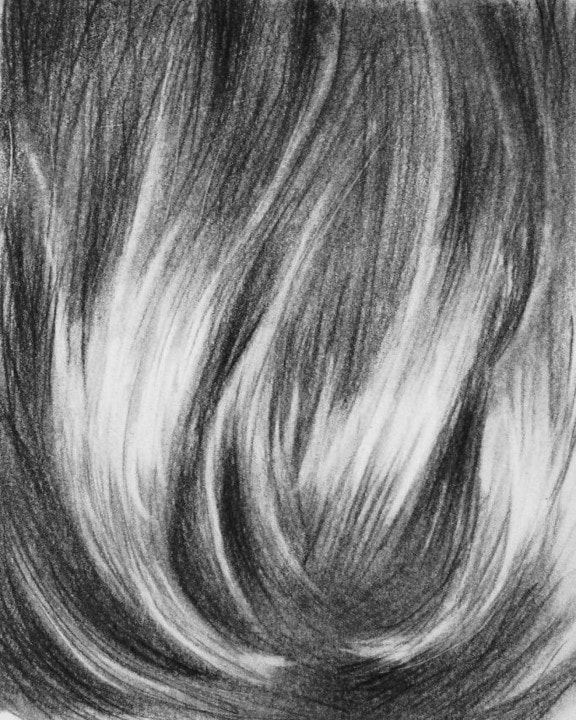
Portraits lesson #13: Curly hair
|
VIdeo coming soon.
|
|


Portraits lesson #12: Straight hair
|
1. Do not draw individual hairs – draw only the big shapes and values.
2. Focus on drawing the negative space areas between the big shapes. 3. Make sure you have all the values represented so your hair has depth and dimension. |
|


Portraits lesson #11: drawing mouths with teeth
What you'll need:
- Your sketchbook, a pencil, a blending stick, and an eraser
- an image with a closed mouth as reference and for you to draw

|

|

|

|
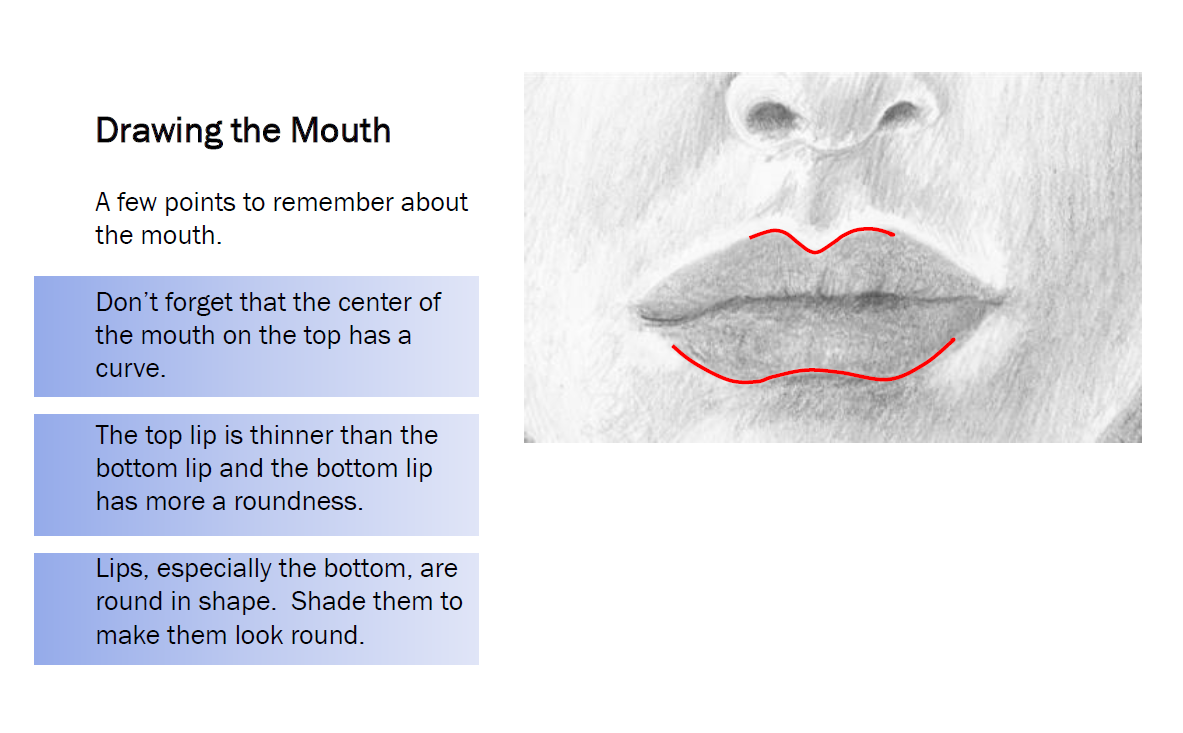
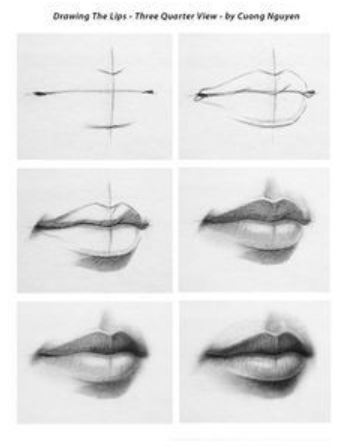
Portraits lesson #10: drawing closed mouths
What you'll need:
- Your sketchbook, a pencil, a blending stick, and an eraser
- an image with a closed mouth as reference and for you to draw
| portrait_drawing_the_mouth.pdf |
|
|


Portraits lesson #9: drawing eyes at side angles
What you'll need:
- Your sketchbook, a pencil, a blending stick, and an eraser
- The reference paper you've been given
- A portrait image with a person facing the side

Portraits lesson #8: practicing the correct proportions of the eyes with the nose
What you'll need:
We're going to put what we've learned about drawing eyes, noses, and face proportions into a drawing. This might be challenging for you the first time or ten, but be patient with yourself and keep trying! Trust me - you'll get better the more you practice!
- Your sketchbook, a pencil, a blending stick, and an eraser
- A reference picture with a clear view of the eyes and nose
We're going to put what we've learned about drawing eyes, noses, and face proportions into a drawing. This might be challenging for you the first time or ten, but be patient with yourself and keep trying! Trust me - you'll get better the more you practice!
Portraits lesson #7: drawing noses from profile angle
What you'll need:
- Your sketchbook, a pencil, a blending stick, and an eraser
- A reference picture of a nose from a profile (side) angle


Portraits lesson #6: drawing noses
What you'll need:
Now that we've learned about face proportions and eyes, it's time to move to noses! This feature can be one of the most frustrating to draw so please don't get discouraged if your first few drawings end up looking like...well, NOT noses!
The most important thing to remember is that drawing nose mostly involves VALUE. There are actually very few sharp lines when drawing a nose realistically. The exception to this is when you are drawing a nose from a profile perspective. We will learn how to draw that next class. Remember that the values will be different for every drawing depending on skin colour, as well as the amount of light and shadow.
I've attached a video that is from another teacher for you to watch in addition to the one I created. Watch hers after you watch mine. She will get you to try drawing it upside down just like I got you to do with eyes last video.
If any of you have any questions for me, or would like some help, email me at [email protected] I will respond to you fairly quickly!
Remember to keep all your sketches you've done for this unit! That is how you are going to get your mark for this unit.
~Ms. Lambert
- Your sketchbook, a pencil (ideally a variety of your art pencils), a blending stick, and an eraser
- A value scale
- the yo front-facing nose reference image you have been handed out (the same as the picture on this lesson post)
- patience
Now that we've learned about face proportions and eyes, it's time to move to noses! This feature can be one of the most frustrating to draw so please don't get discouraged if your first few drawings end up looking like...well, NOT noses!
The most important thing to remember is that drawing nose mostly involves VALUE. There are actually very few sharp lines when drawing a nose realistically. The exception to this is when you are drawing a nose from a profile perspective. We will learn how to draw that next class. Remember that the values will be different for every drawing depending on skin colour, as well as the amount of light and shadow.
I've attached a video that is from another teacher for you to watch in addition to the one I created. Watch hers after you watch mine. She will get you to try drawing it upside down just like I got you to do with eyes last video.
If any of you have any questions for me, or would like some help, email me at [email protected] I will respond to you fairly quickly!
Remember to keep all your sketches you've done for this unit! That is how you are going to get your mark for this unit.
~Ms. Lambert
|
|
|


Portraits lesson #5: drawing eyes using a different technique
What you'll need:
Now that you've learned the steps to drawing an eye, it's time to learn a new technique to keep improving your skills. This might seem like a crazy way of drawing, but I encourage you to give it your best try! The more you practice, the better you'll find your drawing skills.
- Your sketchbook, a pencil, a blending stick, and an eraser
- A reference picture of an eye or a portrait with clear eyes (choose an eye that is facing the front)
Now that you've learned the steps to drawing an eye, it's time to learn a new technique to keep improving your skills. This might seem like a crazy way of drawing, but I encourage you to give it your best try! The more you practice, the better you'll find your drawing skills.


Portraits lesson #4: practice drawing proportions and eyes more!
Take a class and practice the skills you have learned so far. Remember: practice truly helps improve and refine your skills!
- Practice doing sketches of heads at different angles paying special attention to getting accurate proportions. Don't worry about getting accurate features because that is not the goal of this!
- Practice drawing eyes. Draw different shaped eyes, eyes on different angles, both the right and left eyes, and eyes with different valued irises.


Portraits lesson #3: Drawing eyes
|
|
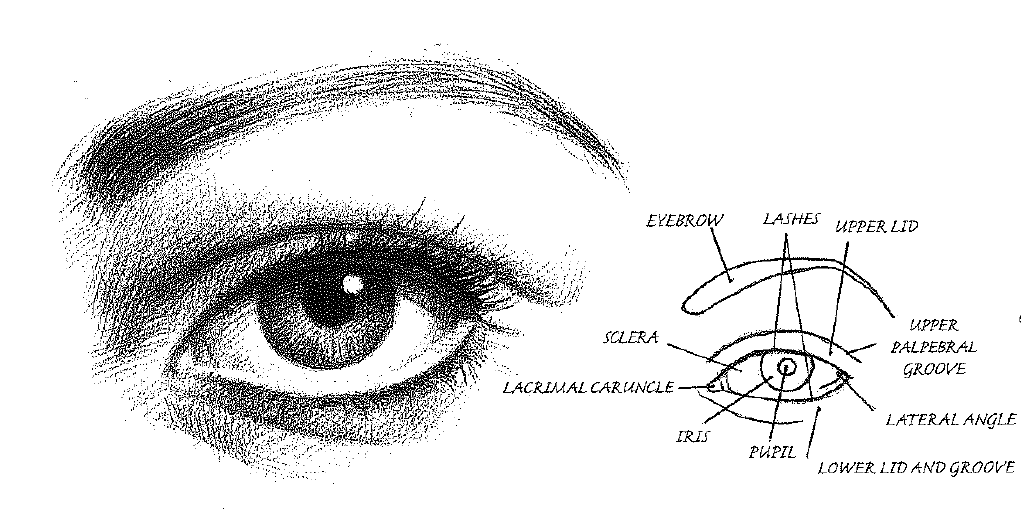
|


|
| ||||
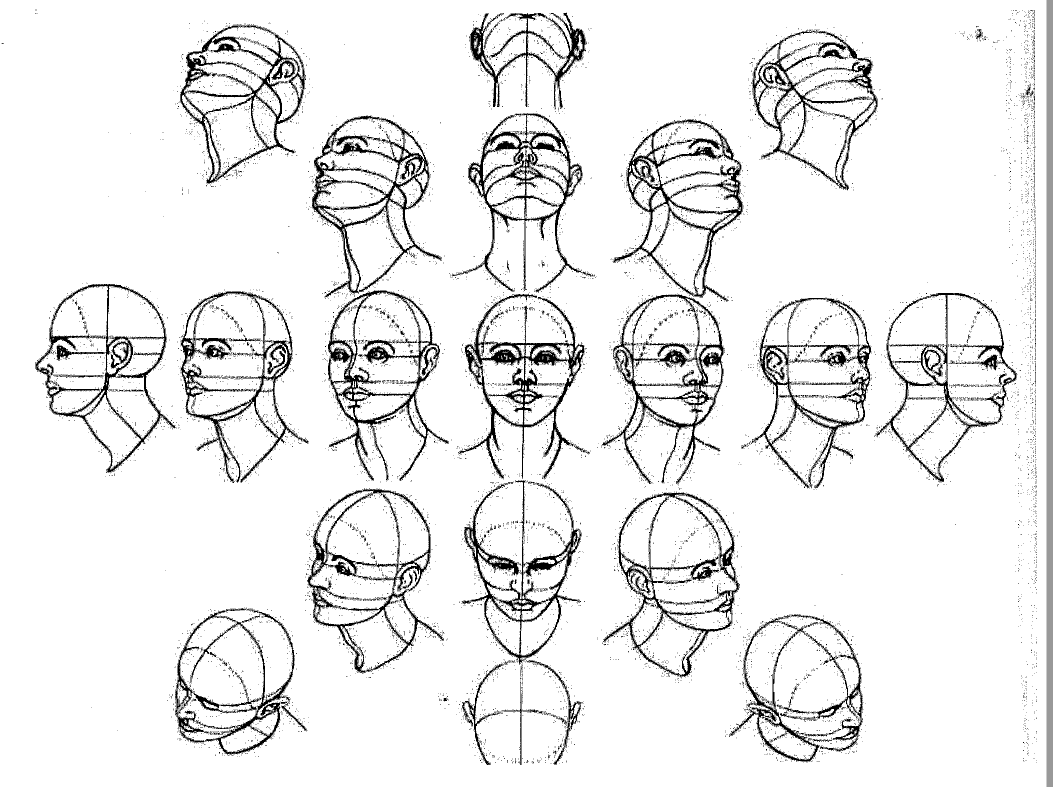
Portraits lesson #2: Practicing proportions at different angles
|
What you'll need:
|
|


Portraits lesson #1: proportions of the face
|
|
|
| ||||||||
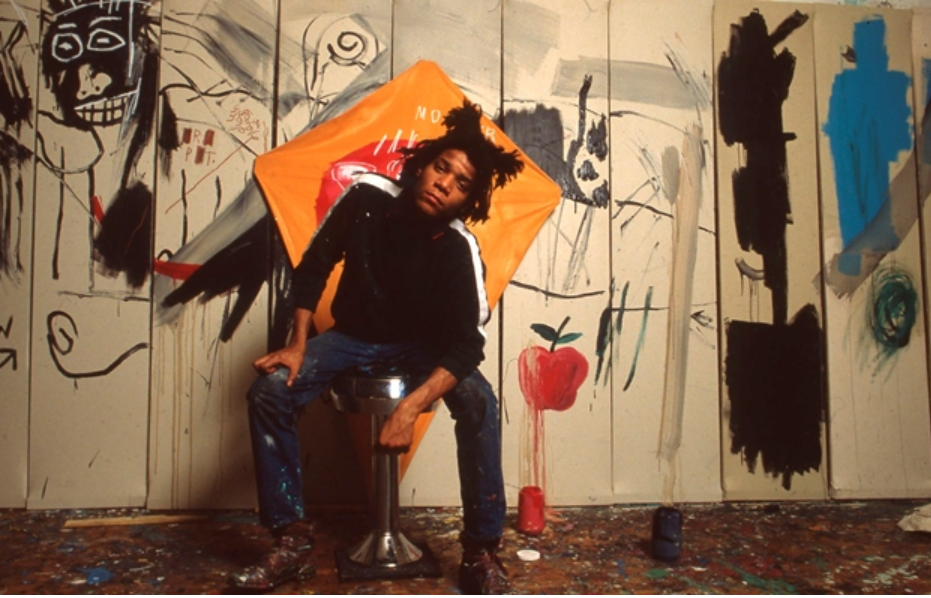
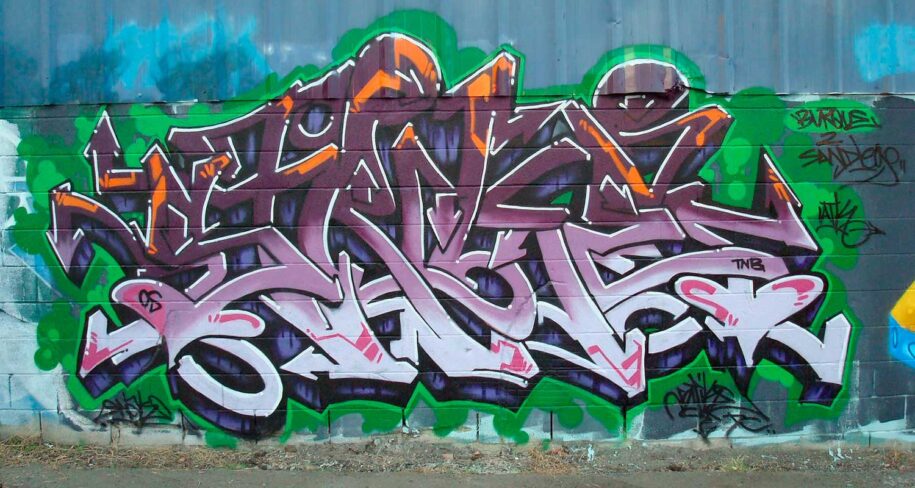
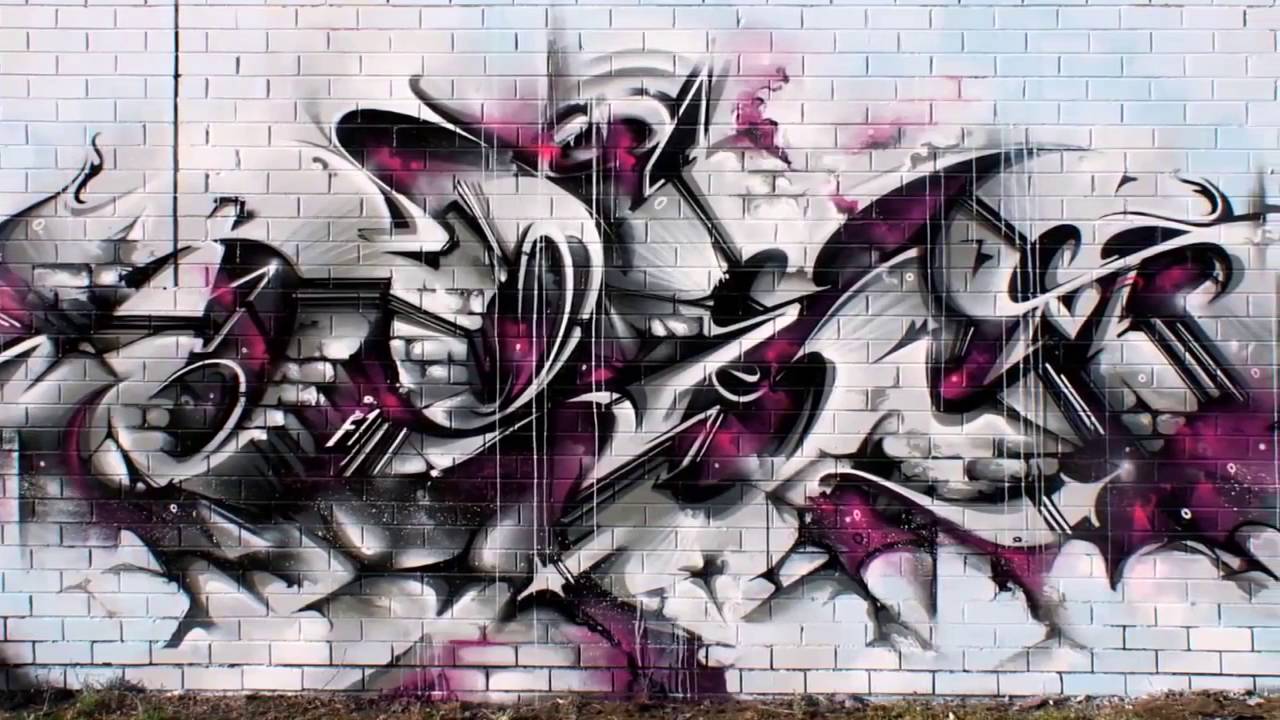
GRAFFITI ART
Below are pictures of graffiti art in our local community.
What do you think? Is it art or is it vandalism? Can it be both?
Scroll through the images and consider these questions.
Then, watch the videos for more in-depth viewpoints on this important topic.
What do you think? Is it art or is it vandalism? Can it be both?
Scroll through the images and consider these questions.
Then, watch the videos for more in-depth viewpoints on this important topic.


|
|
|
"The Rise of Graffiti Art"
Click on the picture below to read a quick history of graffiti art!
Click on the picture below to read a quick history of graffiti art!
The Rise of Graffiti Art
|
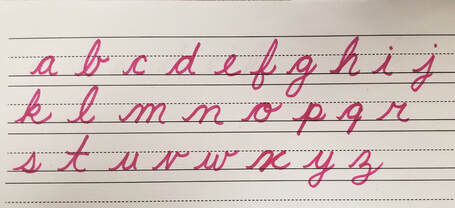
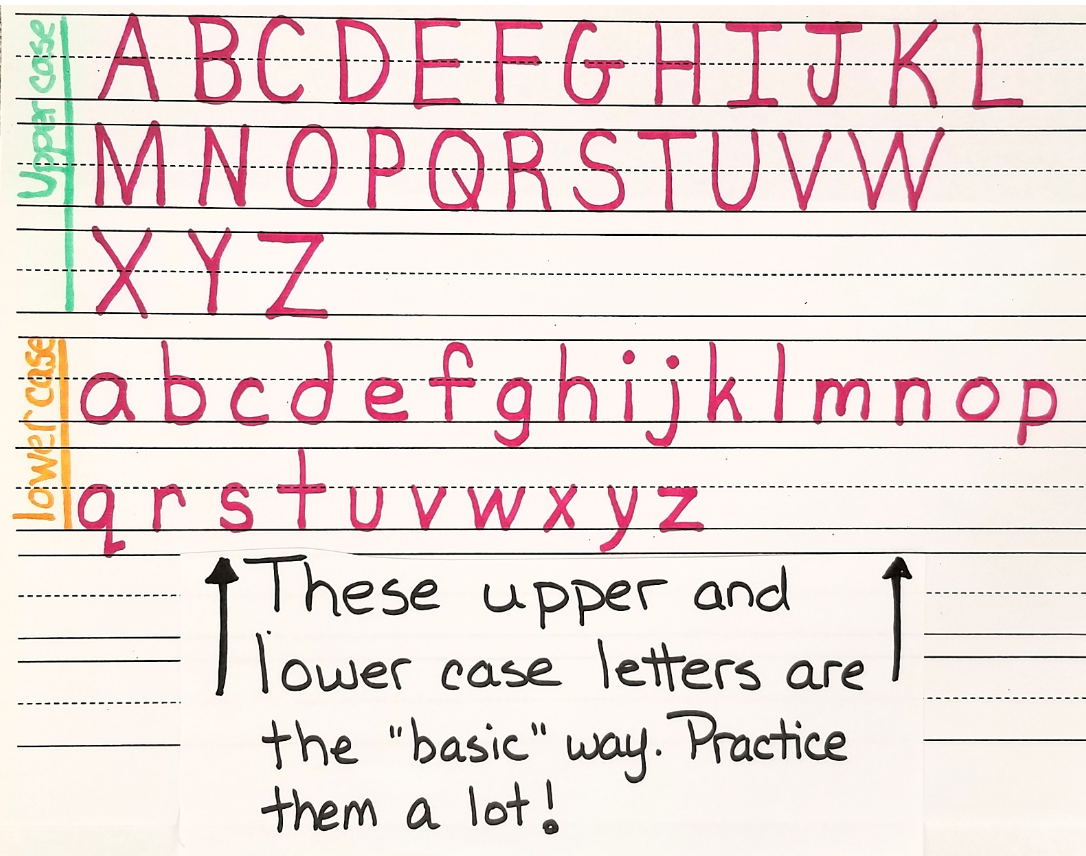
The key to creating successful graffiti lettering is practice! You absolutely need to know and practice the basics of printing in upper and lower case AS WELL AS cursive handwriting! Yes, I know most of you didn't learn handwriting in school, so we are going to learn how to write the A B C's in cursive writing all together.
The videos below are excellent guides on the lower and upper case cursive letters. Even though it's been labeled for kindergarten level, it demonstrates how to write the letters clearly. Follow along and give it a try, just turn down your volume to avoid the annoying music! |
|
|
|
|
|
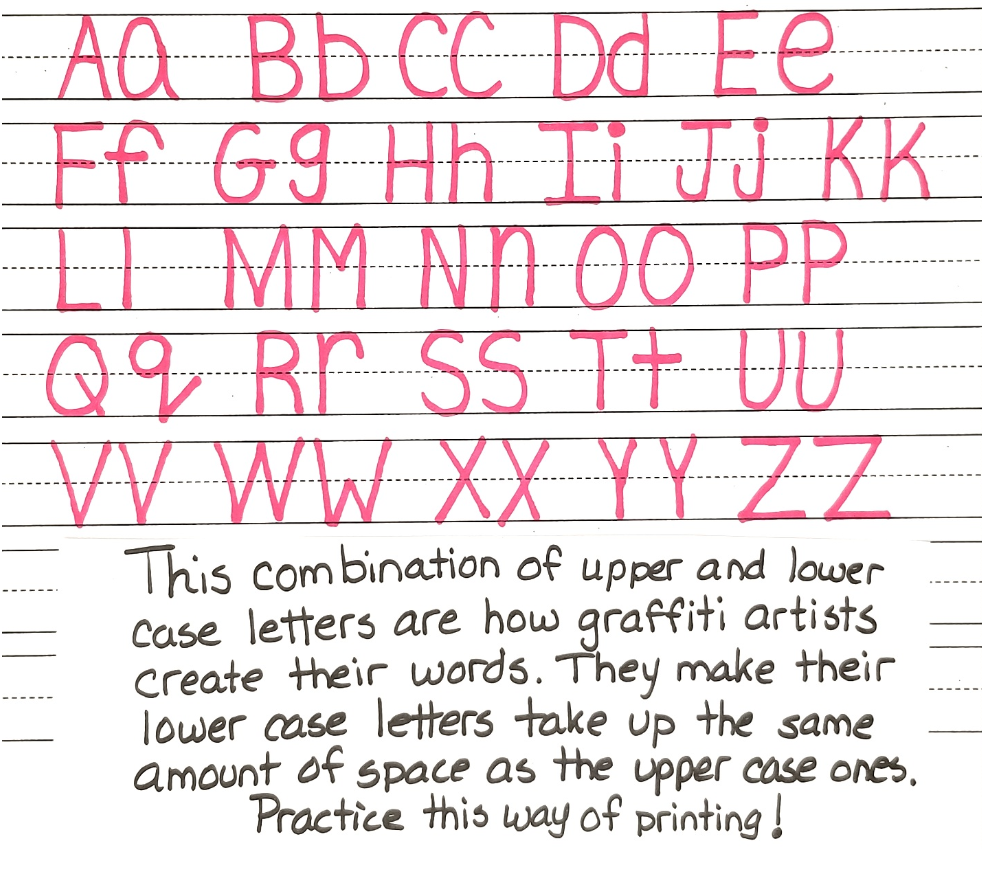
Graffiti artists create incredible artwork that branches out of the basic so it's important that we practice the basics!
Practice writing your "ABC's" in upper and lower case on lined paper. Click on the file "printing paper" to download some to use if you don't have any.
|
| ||
Creating Your Own Unique Tag (signature)
Creating your own tag is more complex than you might think. Most beginers try to go too complicated too quickly. This ends up looking "toy" (amateur). Graffiti artists understand the important art concepts of balance, negative space, and unity when they create art. It's important that you understand why these concepts are key to developing your own unique style.
The videos below explain steps to developing your own tag, and cover how and why all the art concepts need to be incorporated.
The videos below explain steps to developing your own tag, and cover how and why all the art concepts need to be incorporated.


Look at the images of tags above and notice the balance and unity of the entire word. They also include strategically placed embellishments such as symbols, arrows, and extra lines to enhance the overall look and uniqueness of the tag. But don't overdo the amount of symbols and extras you add or else it will look "toy" (amateur and immature).
|
|
|
| 61_artist_alphabets_and_tags.pdf |
Block and bubble lettering
|
Block lettering
|
Bubble lettering
|
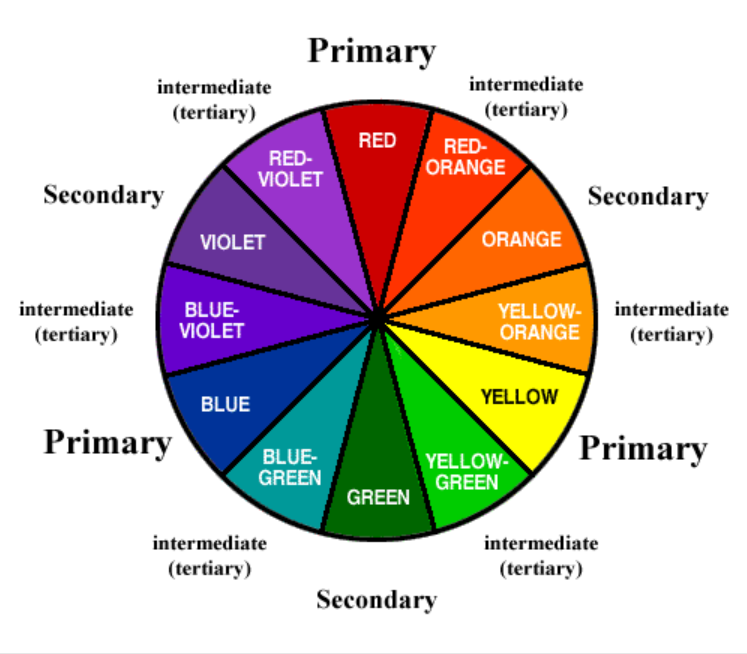
Watch this video to learn how to use your pencil crayons in a professional way.
***TURN DOWN YOUR VOLUME before you press play because it's LOUD!***
Consider how colour theory plays an important role in graffiti art.
***TURN DOWN YOUR VOLUME before you press play because it's LOUD!***
Consider how colour theory plays an important role in graffiti art.
|
|
Watch this video below for an excellent explanation on how to create graffiti pieces out of hand style.
You may want to watch parts of it more than once to get a good handle on the basics of effective piecing (lettering).
You may want to watch parts of it more than once to get a good handle on the basics of effective piecing (lettering).
| graffiti_lettering_package.pdf |
Wildstyle Graffiti
| wildstylegraffiti.pdf |
|
|
Hello to all my grade 9 Art students!
You are in the middle of your 3 or 5-Point Perspective project. I have attached all the PowerPoints we used to learn this art form to this post in case you need to refresh your memory.
The final due date to submit your project is Thursday, November 12th. If you aren't able to submit it in person, please take a photo of it email me at [email protected] If you are taking a photograph of your project, please make sure that the lighting is good and that your project is centered in the photo.
If you have any questions, need help, or just want to say 'hi', feel free to email me at any time!
|
| ||||
|
| ||||
|
| ||||
